How to adjust a doucment form
If you want to use your own original document format or want to modify the format of e-Tax Invoice & e-Receipt and other documents related. You can edit directly from the Leceipt system, or if you have knowledge of HTML, you can edit HTML documents as well.
1. Go to page “Adjust a doucment form”.
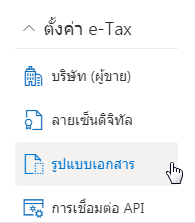
In the left hand side click pn ตั้งค่า (Setting) then click on รูปแบบเอกสาร (Document format).
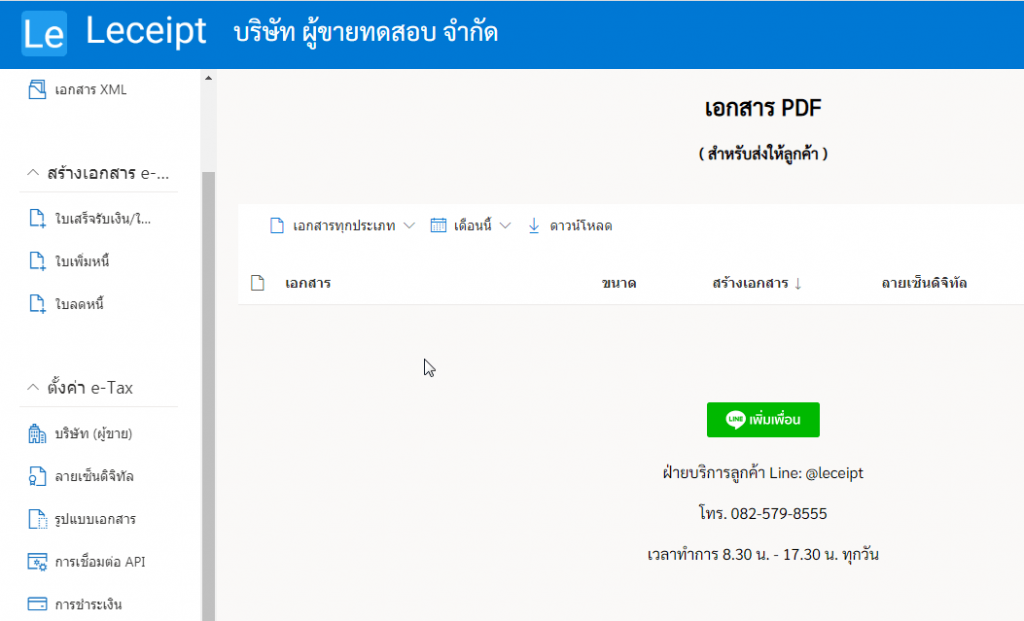
Into the main page you will see as below.
Our support ผู้ใช้ทั่วไป (General users) which has an editing format similar to a document program such as Microsoft Word, which is located in the first section and แบบสำหรับนักพัฒนา with understanding of the HTML language, HTML Code.
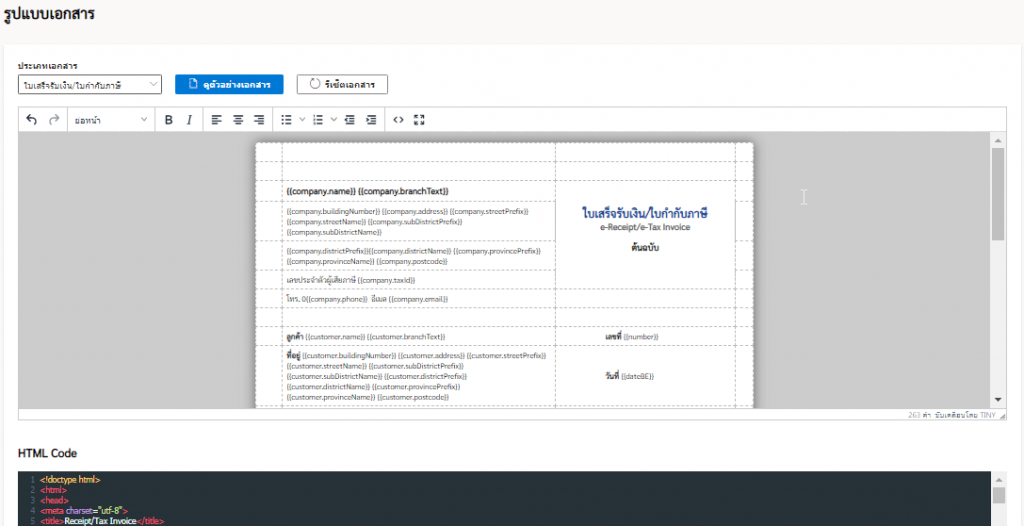
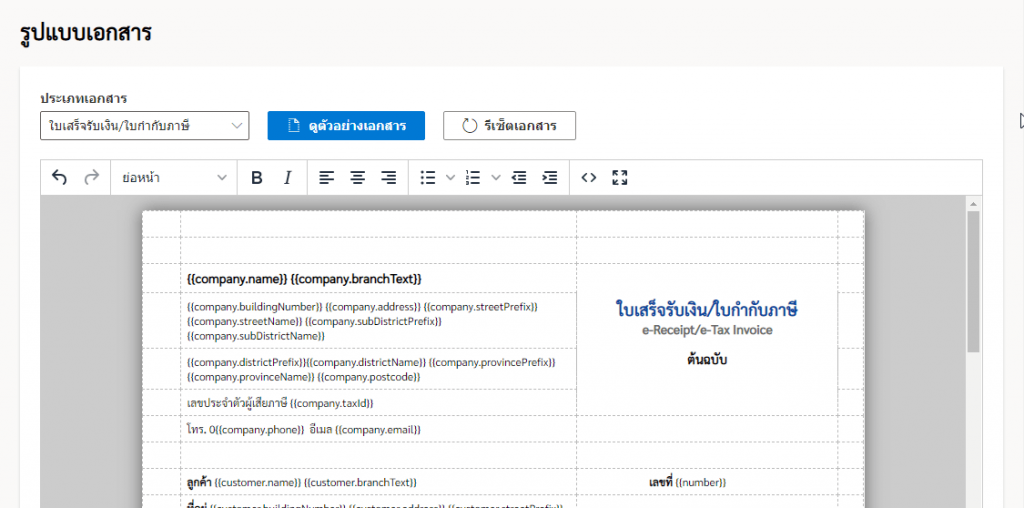
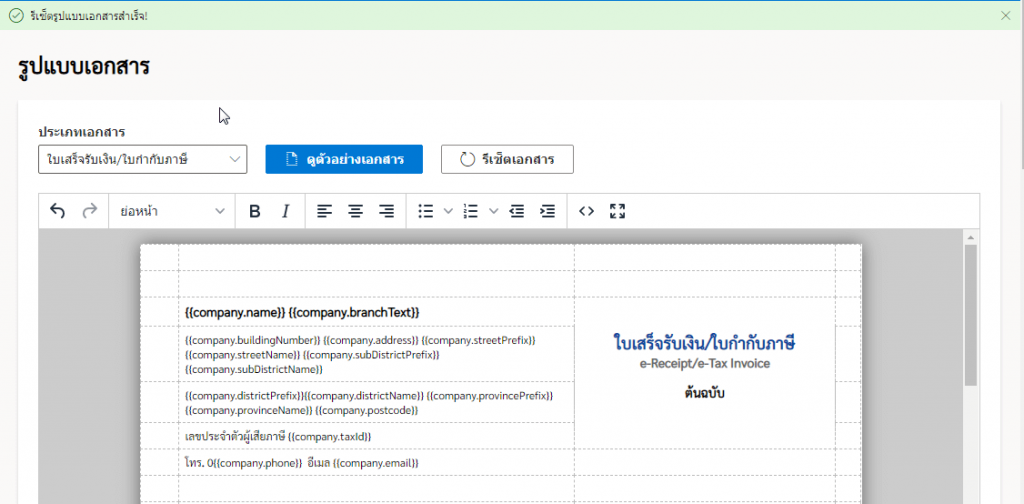
2. Select document type to edit, document preview, and document reset.
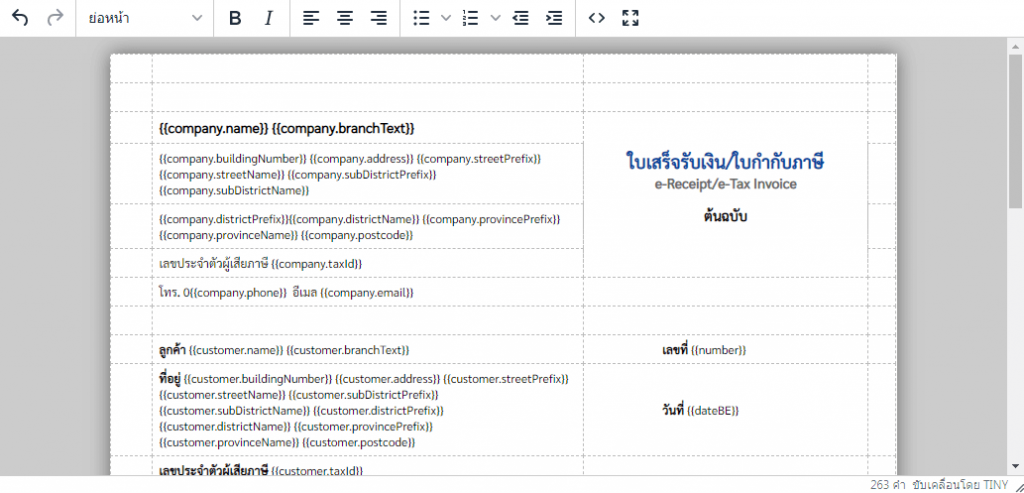
For editing the first form for general users as shown in the image area.
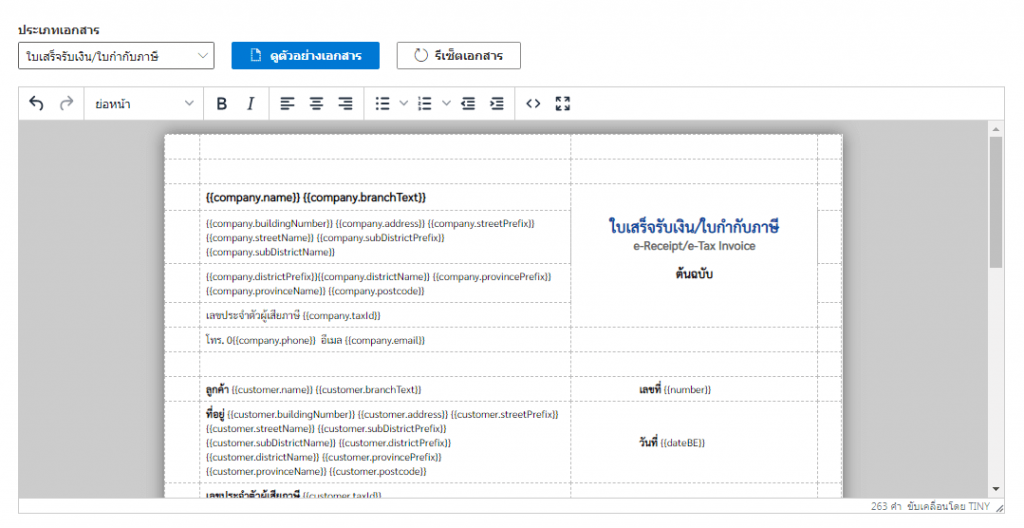
which is divided into 2 parts, the first part is at the top, which will select different types of e-Tax Documents and other doments, the section showing an example of the format of the document form and the reset of the document as shown in the figure.

which describes the following sections:
At ส่วนสำหรับเลือกเอกสารใบกำกับภาษีอิเล็กทรอนิกส์ต่าง ๆ (Select document type) that you would like to edit.

At การดูตัวอย่างของเอกสาร (Show example document) is an example of a document that has been formatted by clicking on the ดูตัวอย่างเอกสาร (Show example document).
which will have a sample document format as shown in the picture.
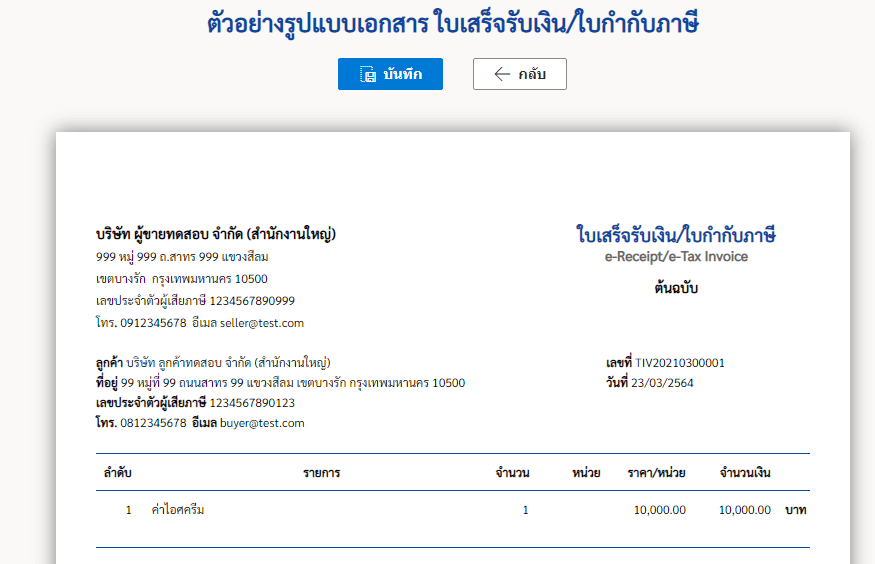
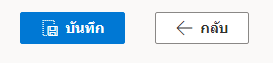
To go back and edit the document format, click the กลับ (Back). But if you want a document format that has been edited or modified already, click on บันทึก (Save).
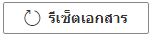
At การรีเซ็ตเอกสาร (Document reset), To reset the document to default settings, click on the รีเซ็ตเอกสาร (Document reset).
Confirm whether to reset this document.
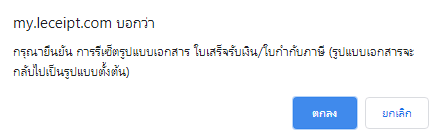
Once reset, the document will be the Leceipt’s default form.
3. Document editor for general users.
The area for editing this part of the document will be as shown in the figure.
In this section, there is a menu that supports the ability to format documents in several sections as follows.
3.1 The menu section above is related to the overall document arrangement.

3.2 Table formatting menu.
By clicking on the document you want to edit, a menu for editing the table will appear.

At
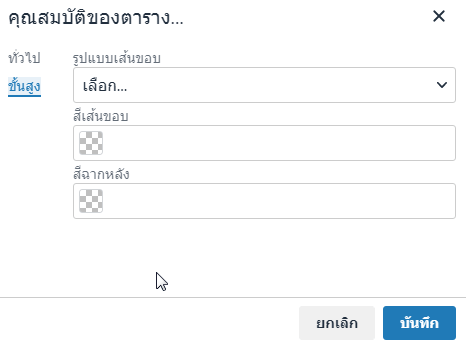
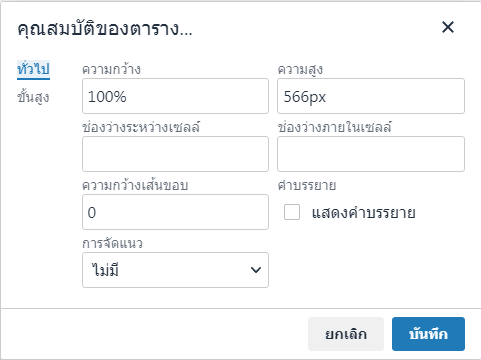
คุณสมบัติตาราง (ะฟิสำ features) is a menu for editing grid layouts and formats related to tables or cells. When the icon above 1 click will find another sub-menu box as shown in the picture.

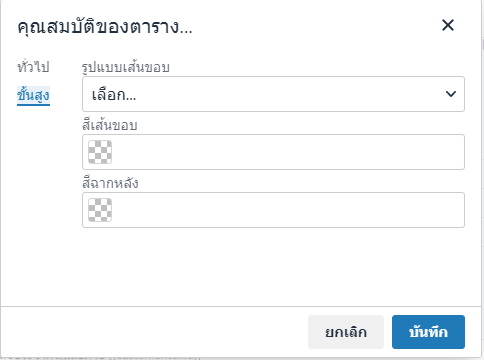
Set the properties of the table into two parts, ทั่วไป (General) and ขั้นสูง (Advance) and when you click on the ขั้นสูง (Advance). There will be a menu for various settings related to the table as shown in the picture.
At
ลบตาราง (Delete table) menu. You can select the table you want to delete and select click on the icon as shown in the picture At
แทรกแถวไว้ก่อนหน้า (Row inserted before) menu is the part to add new row that are added after the original row At
แทรกแถวไว้หลัง (Row inserted after) is when clicking on this menu will have row inserted before the current row At
ลบแถว (Delete row) menu, Click to select the row you want to delete and then click on the menu icon to delete rows At
แทรกคอลัมน์ไว้ก่อนหน้า (Column inserted before) is when you click on the current column, there will be a new column added to the right At
แทรกคอลัมน์ไว้ภายหลัง (Column inserted after) menu is when you click on the current column, there will be an additional column on the left At
ลบคอลัมน์ (Delete column) menu. Click to select the column you want to delete. Then click on the menu icon as shown in the picture 3.3 When right-clicking on the document form area.
Right-clicking on the document form area will bring up a pop-up menu box as shown below.
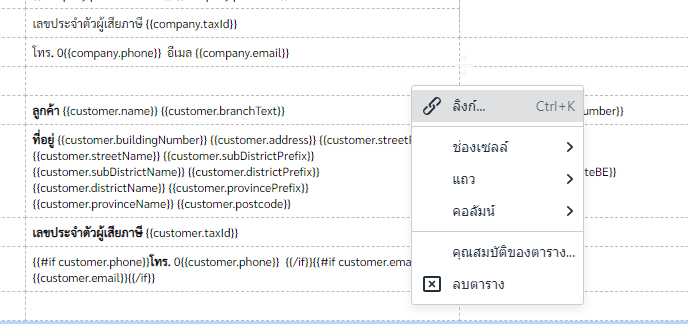
The image below shows a menu box when right-clicked.
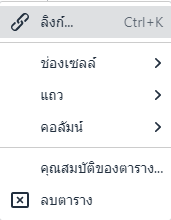
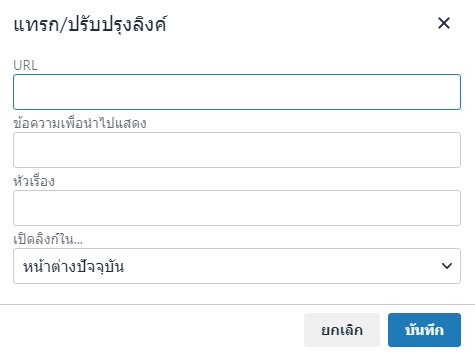
when clicking on the ลิงก์... (Link) This is an external URL link such as a company website with different settings as in the link submenu as shown below.
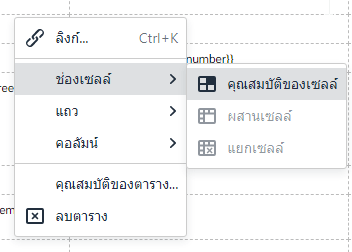
Click on ช่องเซลล์ (Cell) as below.
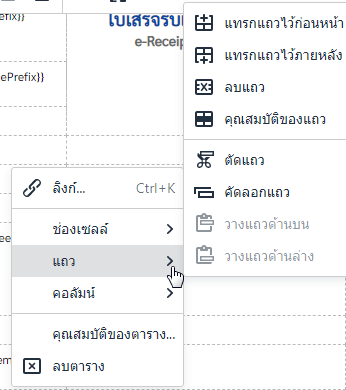
If you click on แถว (Row). You will see as below.
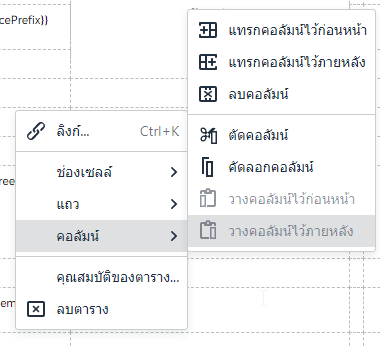
If you click on คอลัมน์ (Column). You will see as below.
For คุณสมบัติตาราง... (Table features), when click on ทั่วไป (General).
And ขั้นสูง (Advance) which are related to setting the border as shown in the figure.
To delete a table, click on the menu ลบตาราง menu.

3.4 Drag text.
You can drag the text to the desired position by double clicking on the text first and dragging it to the position you want to change.
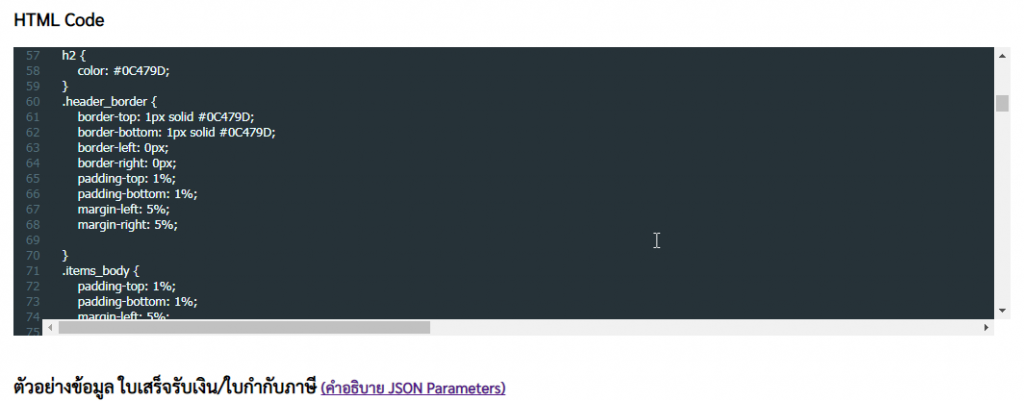
4. HTML code formatting.
Another part of document formatting for those who have knowledge of HTML language is in the HTML Code section, which we have a text editor that supports them to be able to edit and adjust the format of the document.