How to generate a Sales Tax Report
This section we will describe how to genearte the Sales Tax Report.
Sales tax report is a report document that the business operator. Has recorded the details of VAT items from various e-Tax Invoice/e-Receipt documents arising from sales or services to customers each month. which is a report that must be done every month.
For our Leceipt system, it supports generating sales tax reports. which has different steps as follows:
1.Accessing the page “Sales Tax Report”.
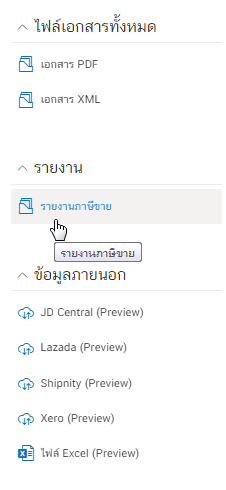
Select the รายงาน (Report) and select the รายงานภาษีขาย (Sales Tax Report).
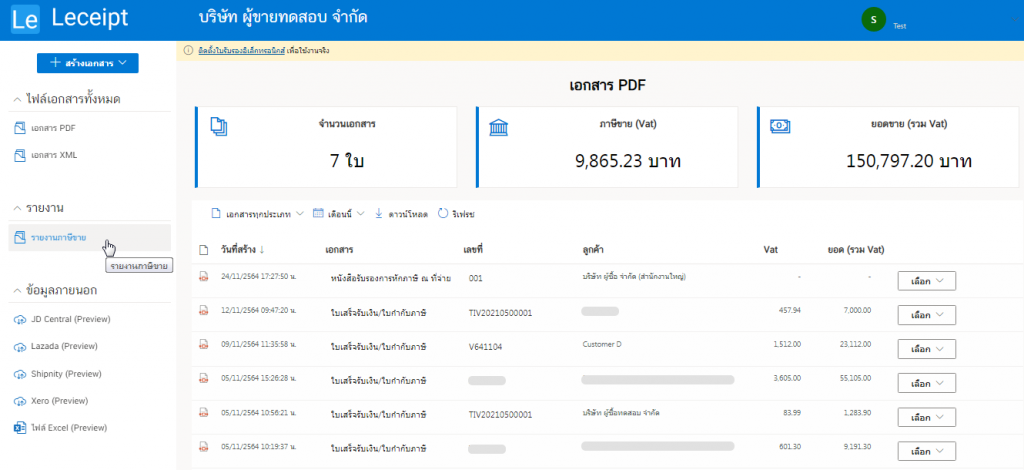
Then found a page that shows the information as in the example picture.
2. Select the month you want to generate the sales tax report document.
Generally, the sales tax report must be submitted to the Revenue Department every month. By selecting the month to generate the sales tax report. which in the example will choose October to submit a report on sales tax documents to the Revenue Department
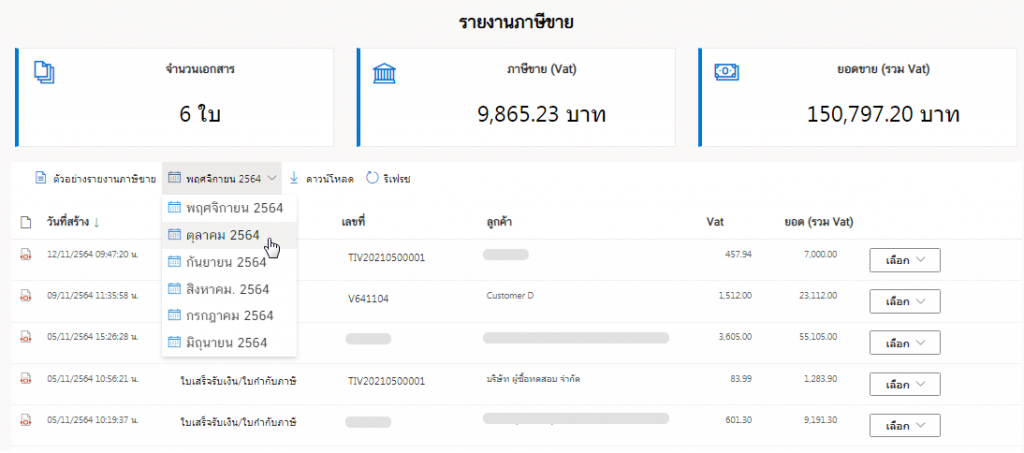
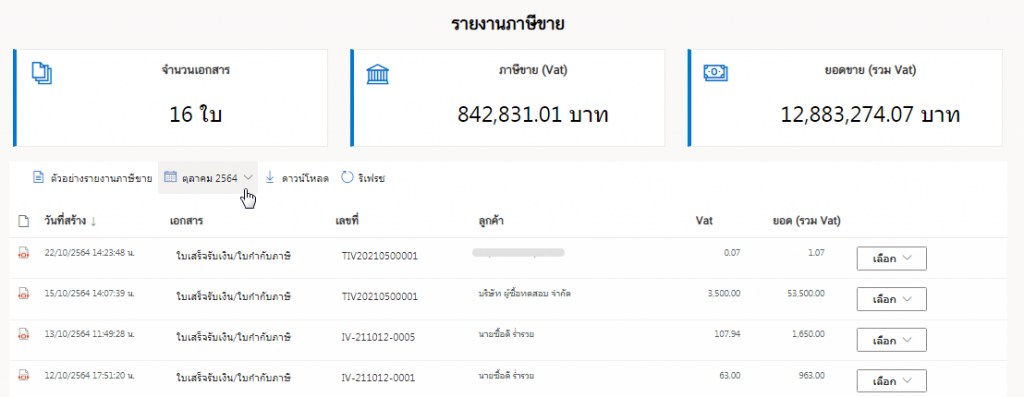
Which will display information “Value Added Tax” of October e-Tax Invoice/e-Receipt Documents as an example.
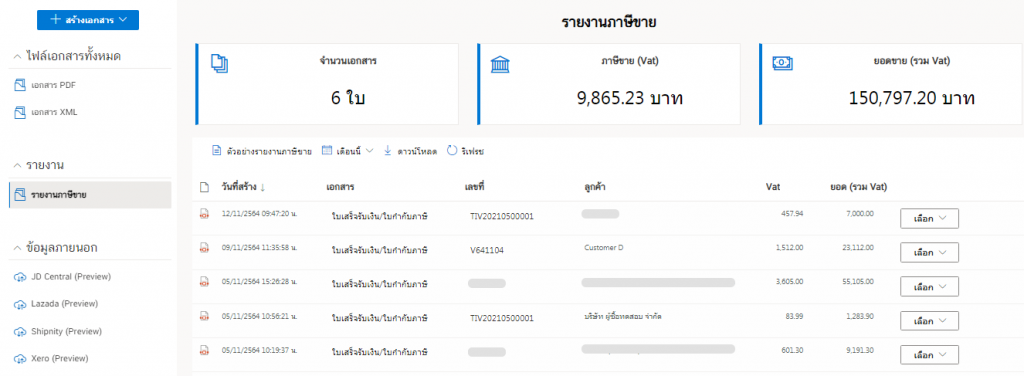
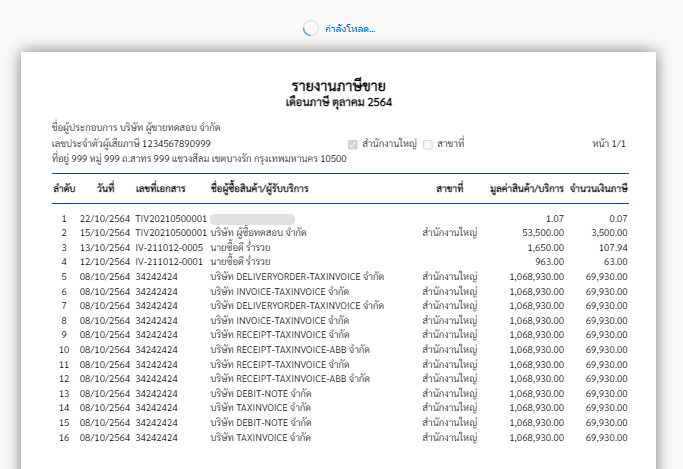
3. Sample of sales tax report.
Once the desired month is selected, click the ตัวอย่างรายงานภาษีขาย (Example of Sales Tax Report)
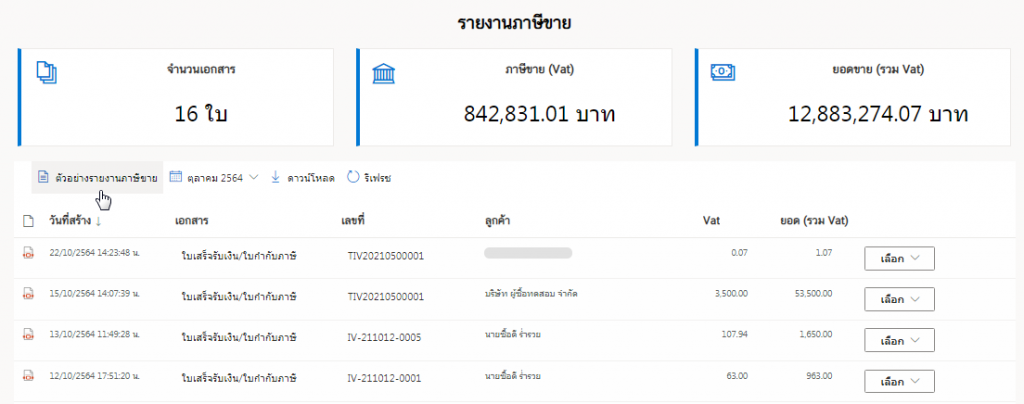
Then the system will process the process to wait a moment as shown in the picture.

Then a sample sales tax report is shown as shown below.
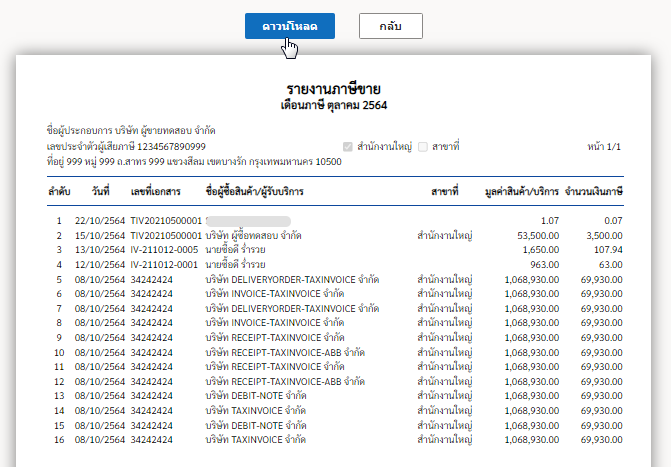
4. Downloading the sales tax report.
Click on the ดาวน์โหลด (Download) as below.
The system will process please wait a moment. Then there will be a PDF document of “Sales Tax Report”, click save on your desktop.
In the event that you do not choose “Sample sales tax report”, you can select the desired month and select the ดาวน์โหลด (Download)

When you click “Download”, wait a moment for the system to process. Then there will be a PDF document of “Sales Tax Report”, click save on your desktop.

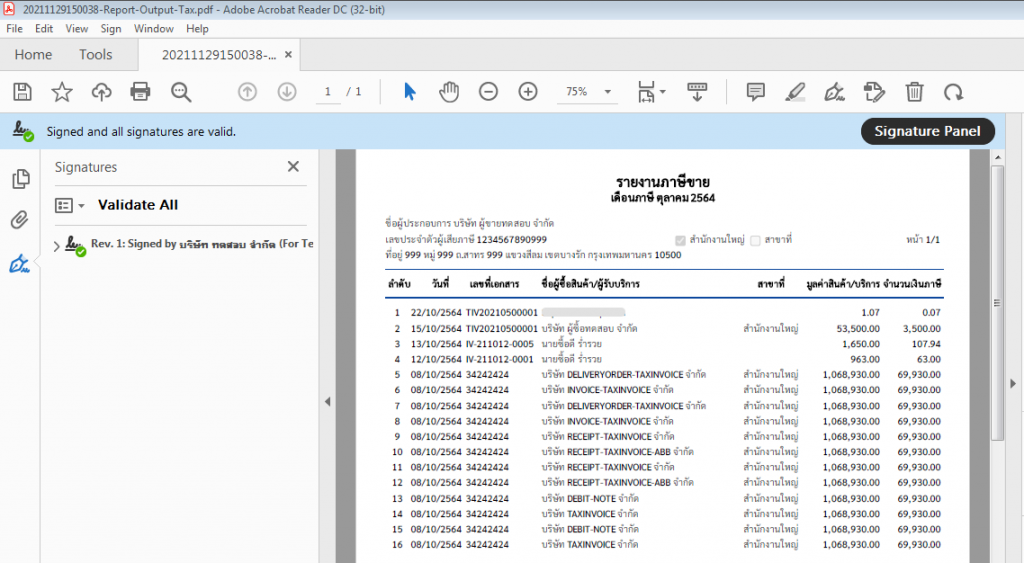
5. Opening the sales tax report (after downloading).
When downloading the “Sales tax report” PDF file and opening the PDF file, use Adobe Acrobat Reader DC to open the document. which will see the document with the signature as shown in the picture.