How to create multiple Withholding Tax Certificate documents at the same time (Excel Upload)
This section explains how to create multiple withholding tax certificates (50 bis) at the same time using Excel Template (which is available for download by Leceipt) and upload them through Leceipt program.
1. Enter the menu “Withholding (50 Bis)”
After logging in to the Leceipt program, notice the menu on the left hand side and click on “Withholding (50 bis)”.
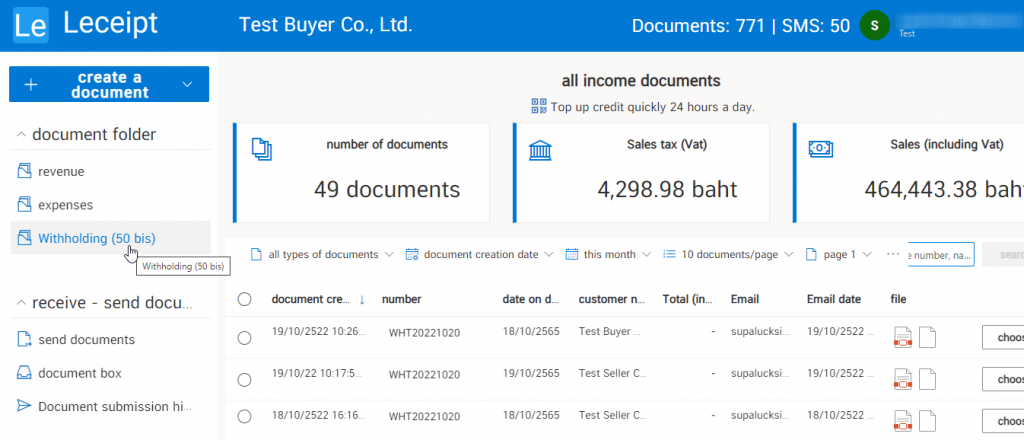
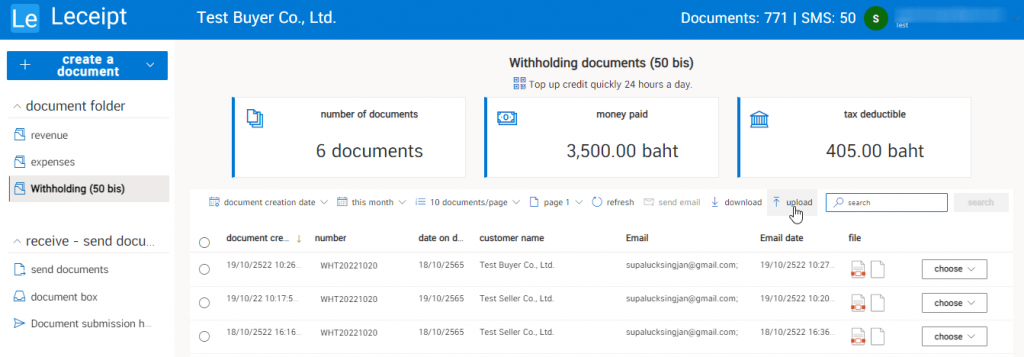
Then click on the “Upload” button.
2. Downloading Excel Template
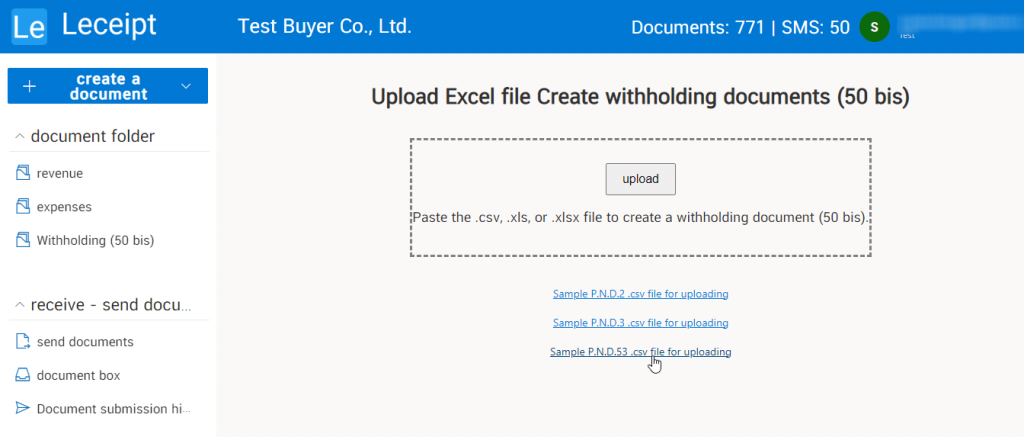
When entering, you will see a page as shown in the picture. This section will download the “Excel Template File” by selecting various PND. 53″ by clicking on “Sample file P.N.D.53 .csv for download”.
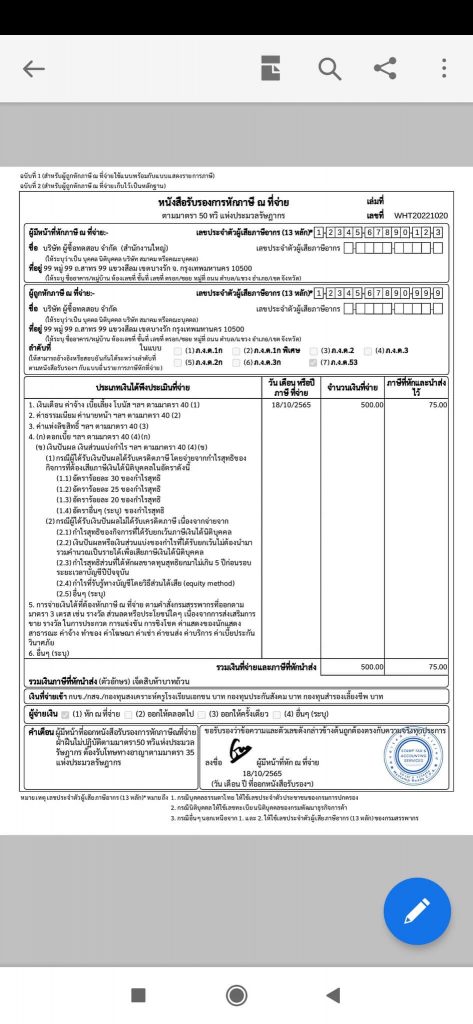
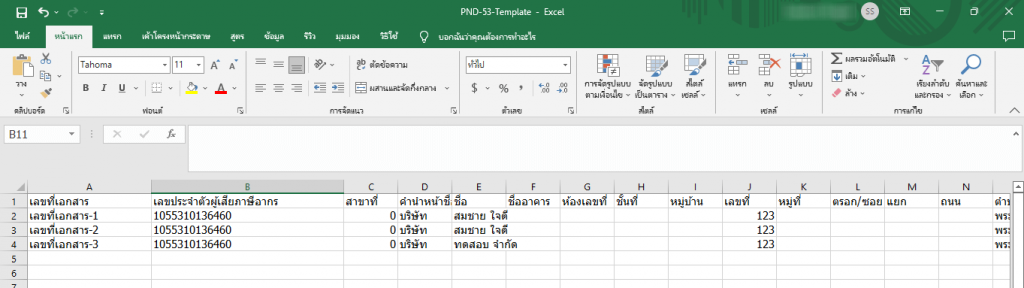
After downloading the Excel file, you will find the following information as an example.
3. Filling out data on Excel Template
The picture below is an example of filling out a withholding tax certificate. It shows how to fill out 1 withholding tax certificate.
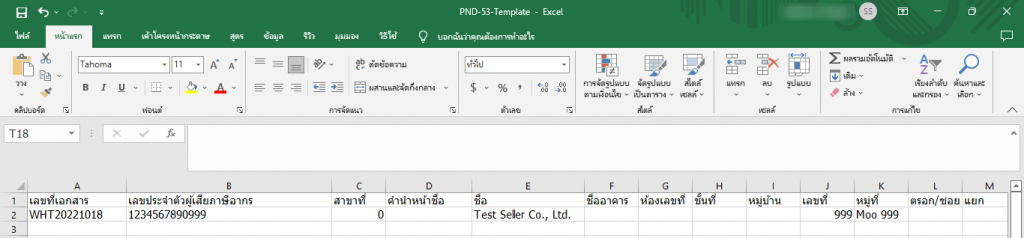
Which will have the method to fill in the following information.
3.1 Document Number, Taxpayer Identification number and Branch no.
Document number : Type the document number. (If it’s a number Select the data type as “General” or “Text” in Excel).
Tax Identification Number : Fill in the Tax Identification Number. (Choose the data type as “General” or “Text” at Excel).
Branch No. : If it is the head office, it is usually the number “0” (Choose the data type as “General” or “Text” at Excel).

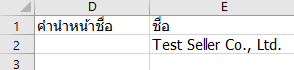
3.2 Prefix and Name
Name Prefix : Put a name prefix such as Mr. Mrs. Ms. or the company as an example is “Test Seller Company Limited” so the title will be “Company”.
Name : Type the name of the seller or the seller’s company.
3.3 Seller address
Enter the name of the building, room number, floor, village , village , alley / alley junction (if it is a number Select the data type as “General” or “Text” in Excel).
Street : Street name.
Sub-district / Sub-District : Other provinces enter the name of the sub-district For Bangkok, enter the name of the district.
District/District : Other provinces enter the district name. Bangkok has a district name.
Province : Enter the name of the province.
Postal Code : Enter ZIP Code. (Choose the data type as “General” or “Text” at Excel).

3.4 Date of Payment and Type of Income
Payment Date : Enter the details of the date of payment. to stay form Day/month/year in Buddhist era format.
Income type : Type the type of income.

3.5 Tax Rate, Amount, Tax Amount and Tax Withholding Conditions
Enter the tax rate, the amount paid. Amount of tax withheld and tax deduction conditions It is a number down that selects the data type as “General” or “Text” at Excel.

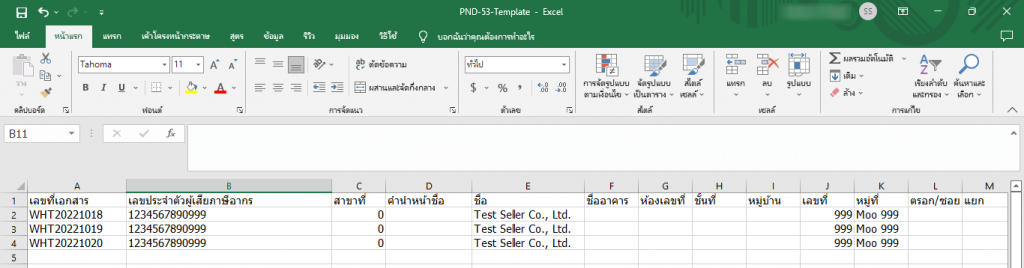
For filling out the withholding tax certificate document, the next step is the same information method.
4. Uploading Files and Generating Withholding Tax Certificates
Go back to the menu “Withholding (50 bis)” and click on “Upload”.
Then upload the Excel Template file that has been filled out. by clicking on the “Upload” button.
This will show the withholding tax certificate documents that have been filled in on the Excel Template.

Click on the circle mark area in front of the word date of payment.
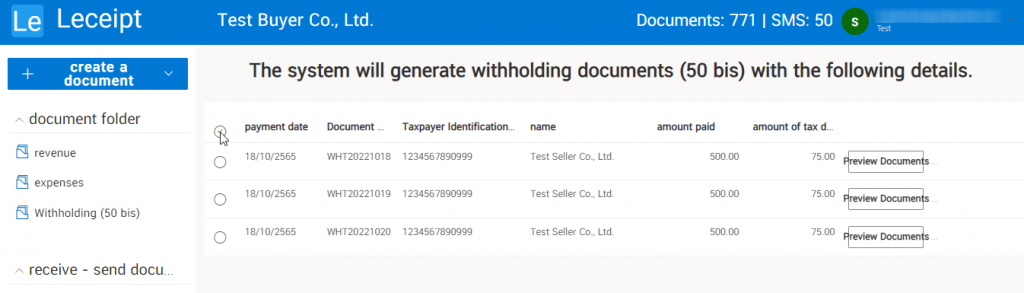
This will select all documents.
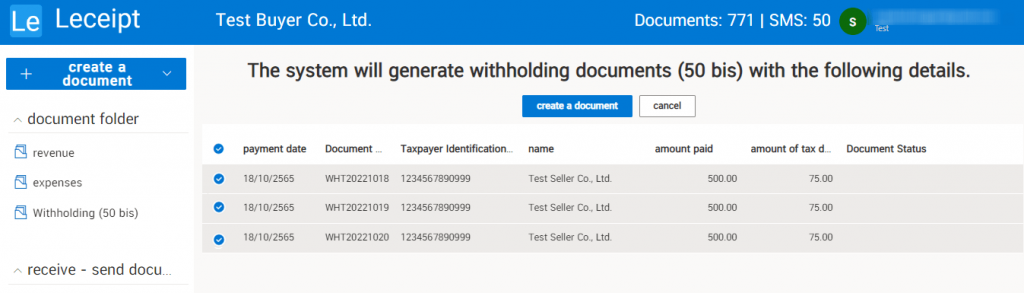
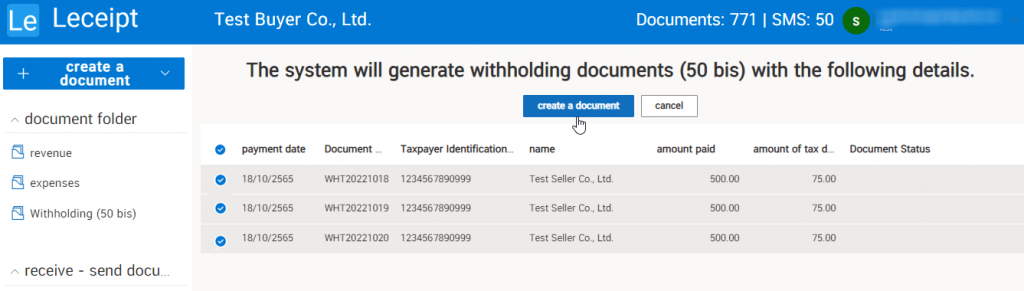
and click on the button “Create Document”.
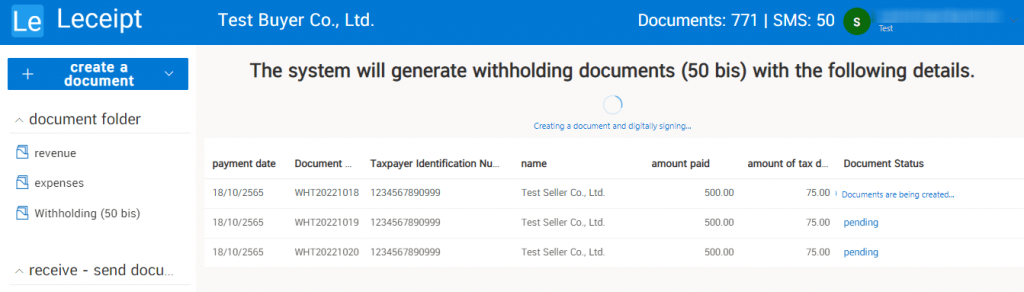
The Leceipt program will create a document and digitally sign it. If the document is in the process of creating a document. The status on the right will say “Creating documents…”.
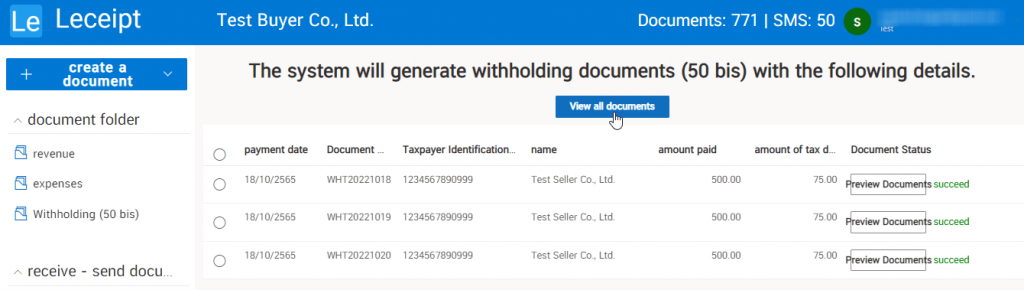
When all the documents have been created successfully. The status on the right will show “Success” as shown in the picture, then click on the button. “View all documents”.
5. Completed Document Files
Which will show the withholding tax certificate as shown in the picture.

This will result in PDF files and image files.

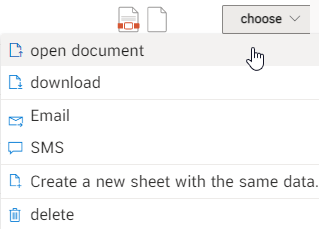
The PDF file is shown with the mouse arrow as shown in the figure. The PDF file explains how to open the file, download, send email and SMS in the next section.

The image file is displayed as an arrow pointing to it. This image file is suitable for sending via Line or other applications that support sending image files.

6. Opening the Document File
For opening a document here is a PDF file, there are 2 ways to open the file:
Clicking on the PDF icon as shown.
And click on the menu “Select” and then click on “Open Document”.
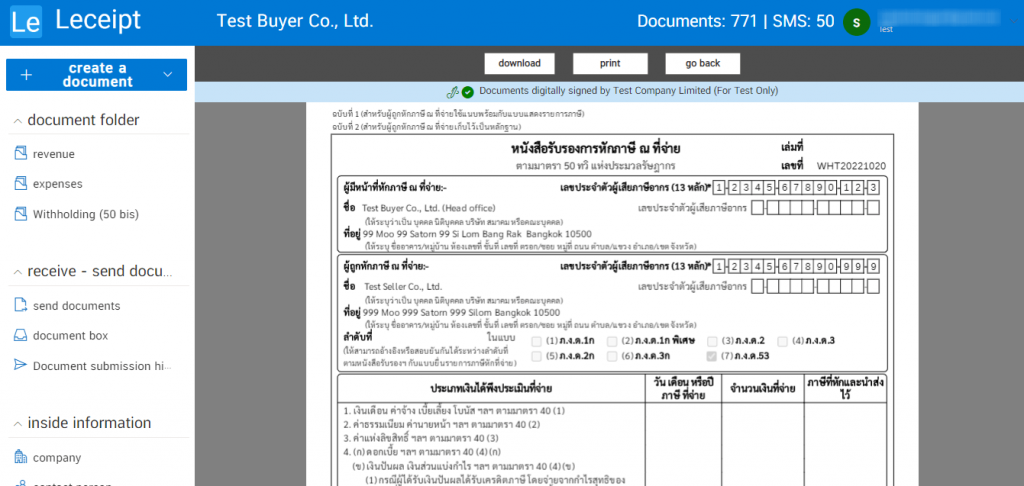
Which when opening the document, it will show as shown in the picture You can click on the “Download” button or you can print it out in paper form by clicking the “Print” button.
7. Downloading Document (PDF file)
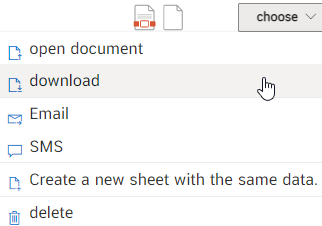
Which here is to download a PDF file. You can click download after opening the document in step 6.
Or go to the “Select” menu and click on the “Download” button.
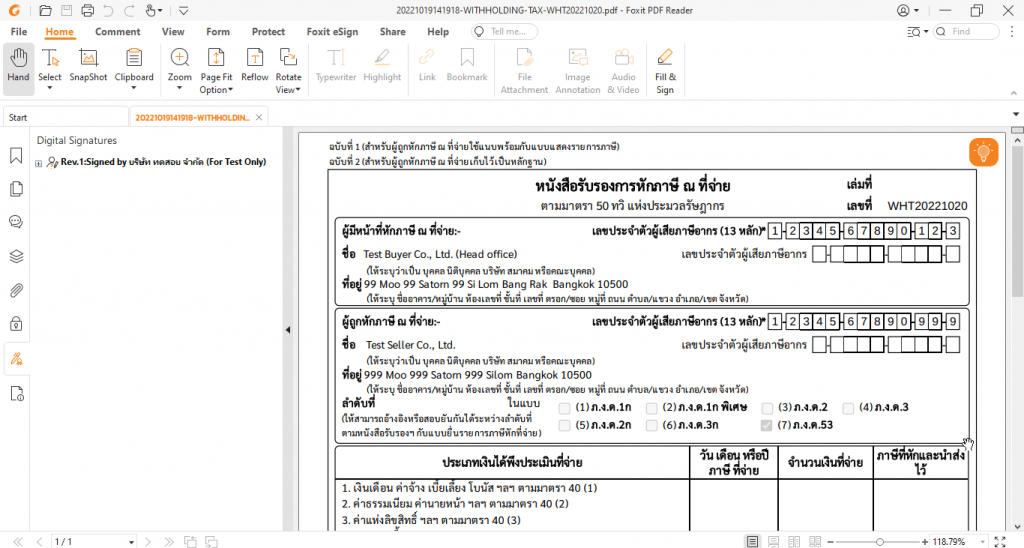
Downloaded PDF documents are recommended to be opened with Foxit PDF Reader.
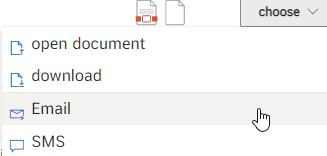
8. Emailing PDF Document
Click on the “Select” menu and then click on “Email”.
Enter the email address you want to send.

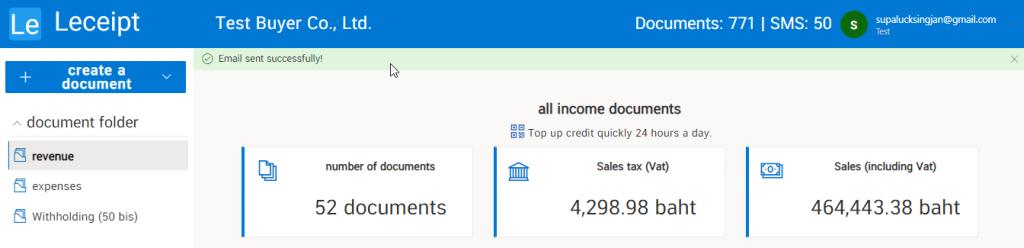
If the email is sent successfully, the message above will say “Successfully sending email”.
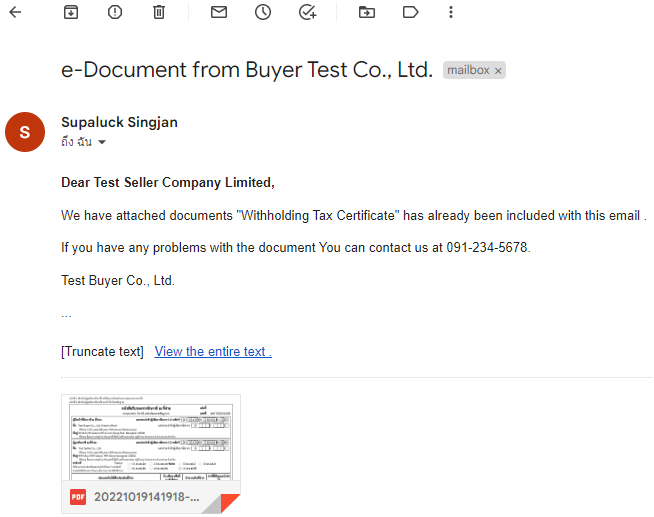
At the destination e-mail will receive messages and documents sent.
9. Sending SMS PDF Document
Click on the “Select” menu and then click on “SMS”.
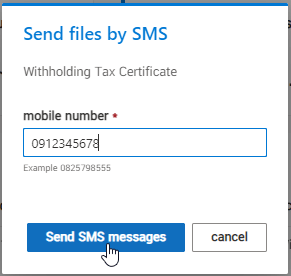
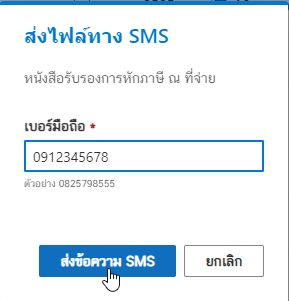
Enter the destination phone number you want to send.
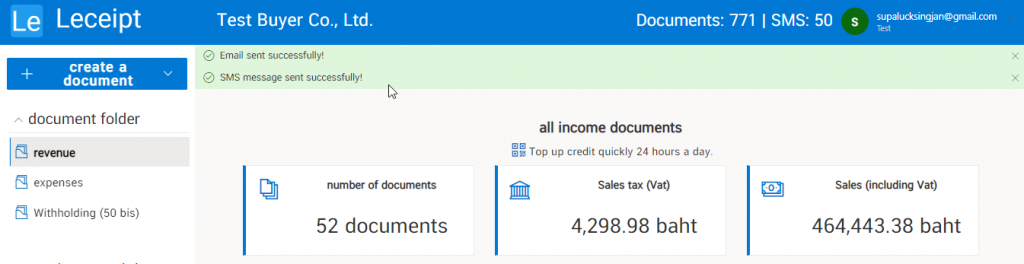
If the SMS is sent to the destination successfully, it will say “SMS Sent Successfully”.
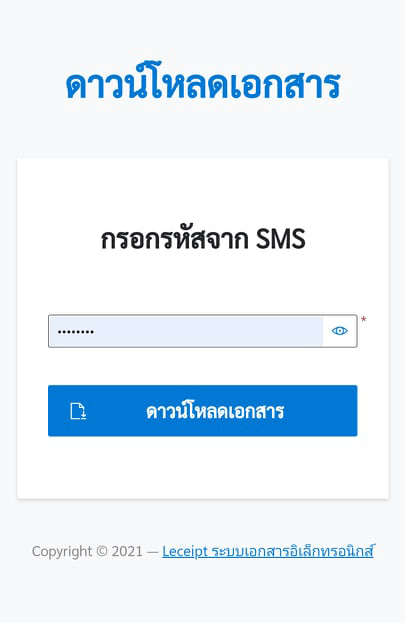
Let’s look at the part of the destination of the person receiving the SMS. When opening the mobile phone, a message will appear as shown in the picture.
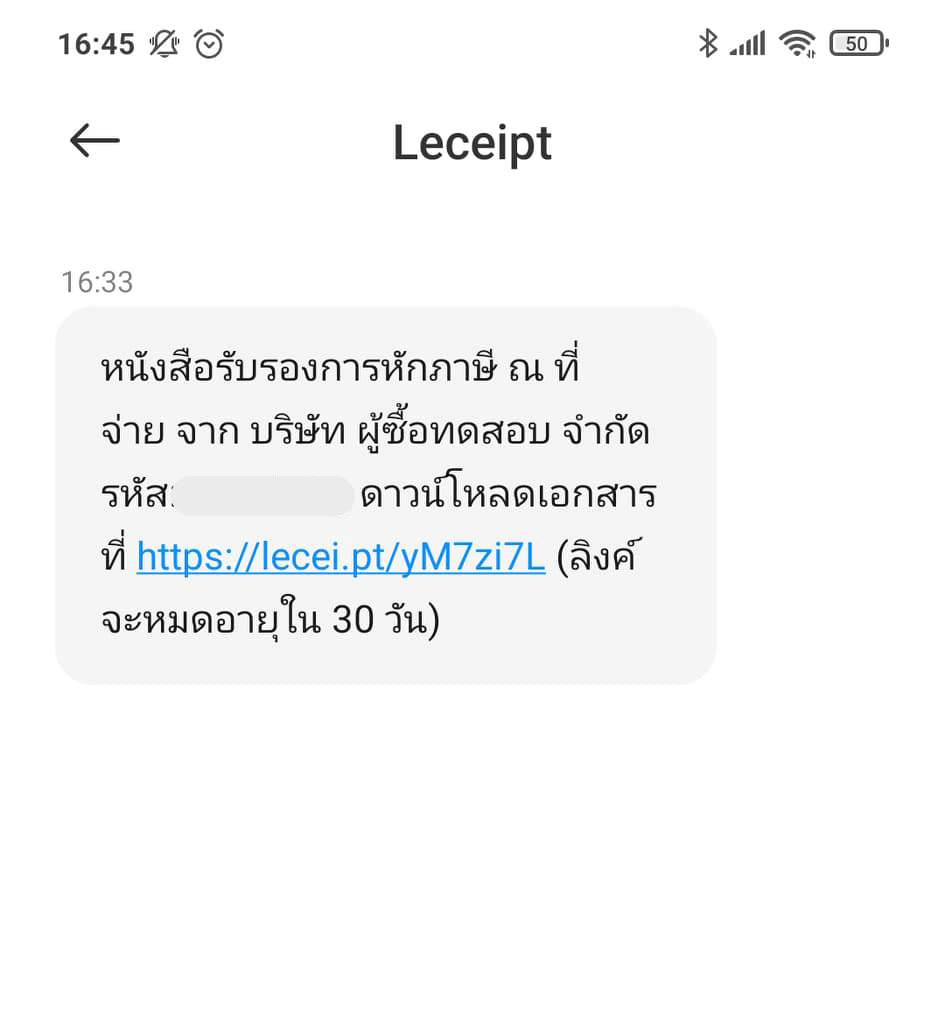
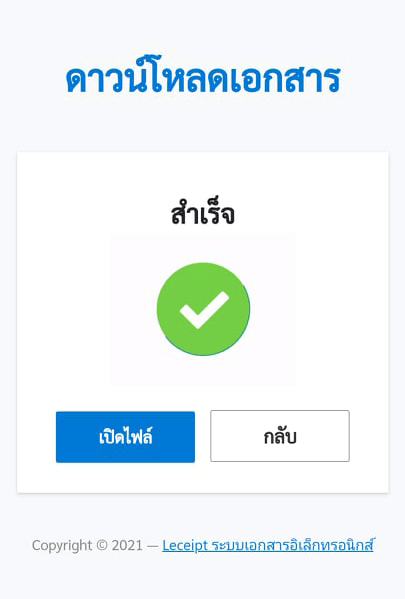
When you click on the link The system will show up as shown in the figure. Then enter the code sent by SMS.
Click the “Open file” button, which should also install an application for opening PDF (if you don’t have one).
Preview PDF files using the “Adobe Acrobat Reader: PDF Viewer, Editor & Creator” application.